文章大纲
注意:
此功能基于 Intel 集显中的Virtualheads功能,在 AMD 核显和独显中无效。
启用虚拟显示输出头
开启 Virtualheads 功能:
cat <<EOF | sudo tee > /usr/share/X11/xorg.conf.d/20-intel.conf
Section "Device"
    Identifier "intelgpu0"
    Driver "intel"
    Option "VirtualHeads" "1"
EndSection
EOF
注意:
Option “VirtualHeads” “1” 中的 “1” 代表创建一个虚拟显示输出头。
重启电脑,使用 xrandr 命令验证是否有 VIRTUAL 的信息:
hcai@RHT-P1:pts/1-> /home » hcai (0)
> xrandr
Screen 0: minimum 8 x 8, current 3920 x 1200, maximum 32767 x 32767
eDP1 connected 1920x1080+2000+120 (normal left inverted right x axis y axis) 340mm x 190mm
   1920x1080     60.01*+  59.93
   1680x1050     59.95    59.88
...

DP1 disconnected (normal left inverted right x axis y axis)
DP2 disconnected (normal left inverted right x axis y axis)
DP3 connected (normal left inverted right x axis y axis)
   1024x768      60.00 +
...

VIRTUAL1 disconnected (normal left inverted right x axis y axis)
开启虚拟显示屏
使用 cvt 命令获取所需分辨率的配置(我的平板分辨率是 2000×1200):
cvt 2000 1200
# 2000x1200 59.91 Hz (CVT) hsync: 74.59 kHz; pclk: 200.50 MHz
Modeline "2000x1200_60.00"  200.50  2000 2136 2344 2688  1200 1203 1213 1245 -hsync +vsync
复制上述 Modeline 后面的输出,生成一个新的分辨率mode :
xrandr --newmode "2000x1200_60.00" 200.50 2000 2136 2344 2688 1200 1203 1213 1245 -hsync +vsync启动虚拟显示器:
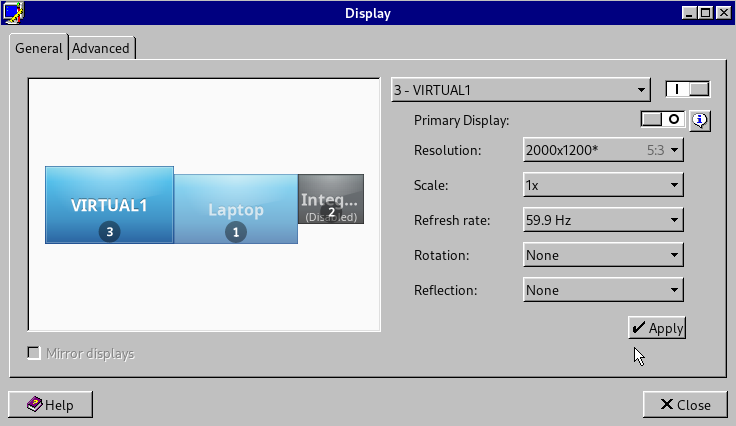
xrandr --addmode VIRTUAL1 "2000x1200_60.00"此时在系统的显示器设置界面应该可以看到 VIRTUAL1
配置 X11VNC
使用 X11VNC 将虚拟屏幕的输出映射到平板上。
安装 X11VNC :
sudo dnf install -y x11vnc设置防火墙:
firewall-cmd --add-port=5999/tcp --per
firewall-cmd --add-port=5999/tcp
设置访问密码:
x11vnc -storepasswd开启vnc:
x11vnc -rfbport 5999 -clip xinerama0 -wait 1 -defer 1 --nowf -sb 0 -noxdamage| 选项 | 描述 |
|---|---|
| -rfbport | 监听的端口 |
| -clip | xinama0 中的 0 代表从左往右数第一个平面,我的平板放在电脑的左侧,所以写 0 |
| -wait | 屏幕抓取时间,默认20 ms,设置为 1 降低延迟 |
| -defer | 向客户端发送更新的间隔,默认 20ms,设置为 1 降低延迟 |
| -nowf | 拖动窗口时,实时展现 |
| -sb | 休眠时间,0 代表不休眠,默认 60 s |
注意:
x11vnc 命令要保持运行!
安装平板连接 VNC
推荐使用 bVNC 进行连接,使用电脑的ip地址,和 5999 端口,验证密码后就能扩展了。
但是延迟非常高,不管电脑是连接无线还是有线。为了降低延迟可以使用数据线连接电脑,开启反向代理。
使用反向代理
Android 开启开发者模式,且打开了USB 调试开关后,数据线连接到电脑。
安装 ADB 驱动:
sudo dnf install android-tools开启代理:
adb reverse tcp:5999 tcp:5999注意:
此时 Android 设备上会提示是否允许电脑进行调试,要点击确认。
随后使用 bVNC 进行连接时,地址可以填写为 localhost:5999 ,效果提升非常明显,有效的降低延迟。